Reporting
1. Report Selection Window
The calculation report is prepared from the Report Selection window. The window is opened with the Rapor (Report) button on the top bar, Report › Create Selective Report (Alt+R), Create Report in the Static Analysis window, or the right-click menu on an empty area.
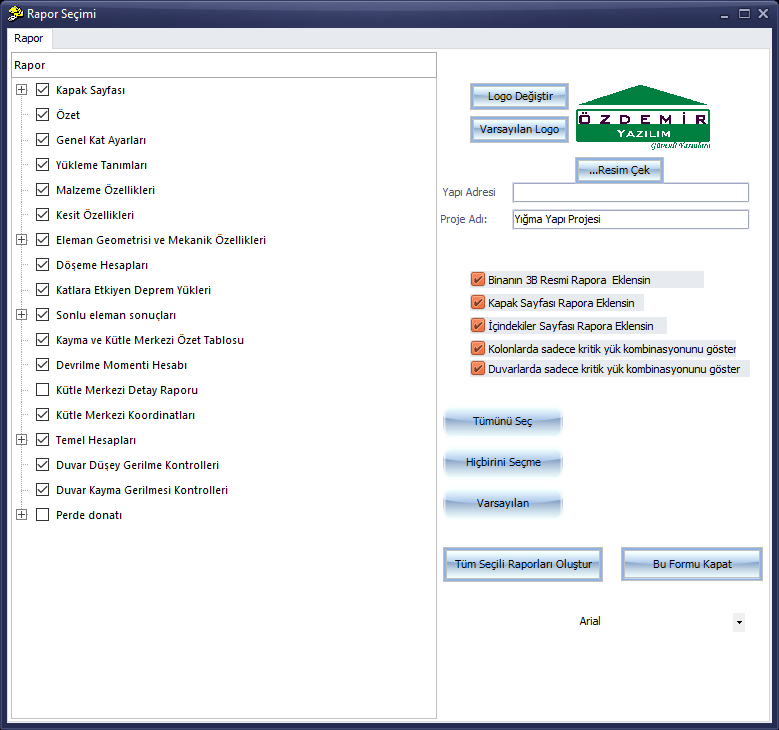
Report Selection window
- On the left is the tree of the report sections (Cover Page, Summary, General Storey Settings, Load Definitions, Material Properties, Slab Calculations, Seismic Loads Acting on the Storeys, Finite element results, Foundation Calculations, Wall Vertical Stress and Shear Stress Checks, etc.). Sections marked with “+” expand into subsections.
- On the right are the logo and 3D picture (Change Logo, Default Logo, Take Picture), Building Address, Project Name and the report options (3D picture, cover, table of contents, critical combination displays).
- The Select All, Select None, Default, Create All Selected Reports and Close This Form buttons; the font list.
Warning: The analysis must have been run in order to obtain a report. If the project has been changed after the analysis, the analysis must be repeated before the report is produced.
2. Creating the Report and Previewing
- Tick the sections to be included in the report.
- Click Create All Selected Reports. During preparation, a circular progress indicator showing a percentage appears on the screen.
- When the report is ready, the full-screen Preview window will open.
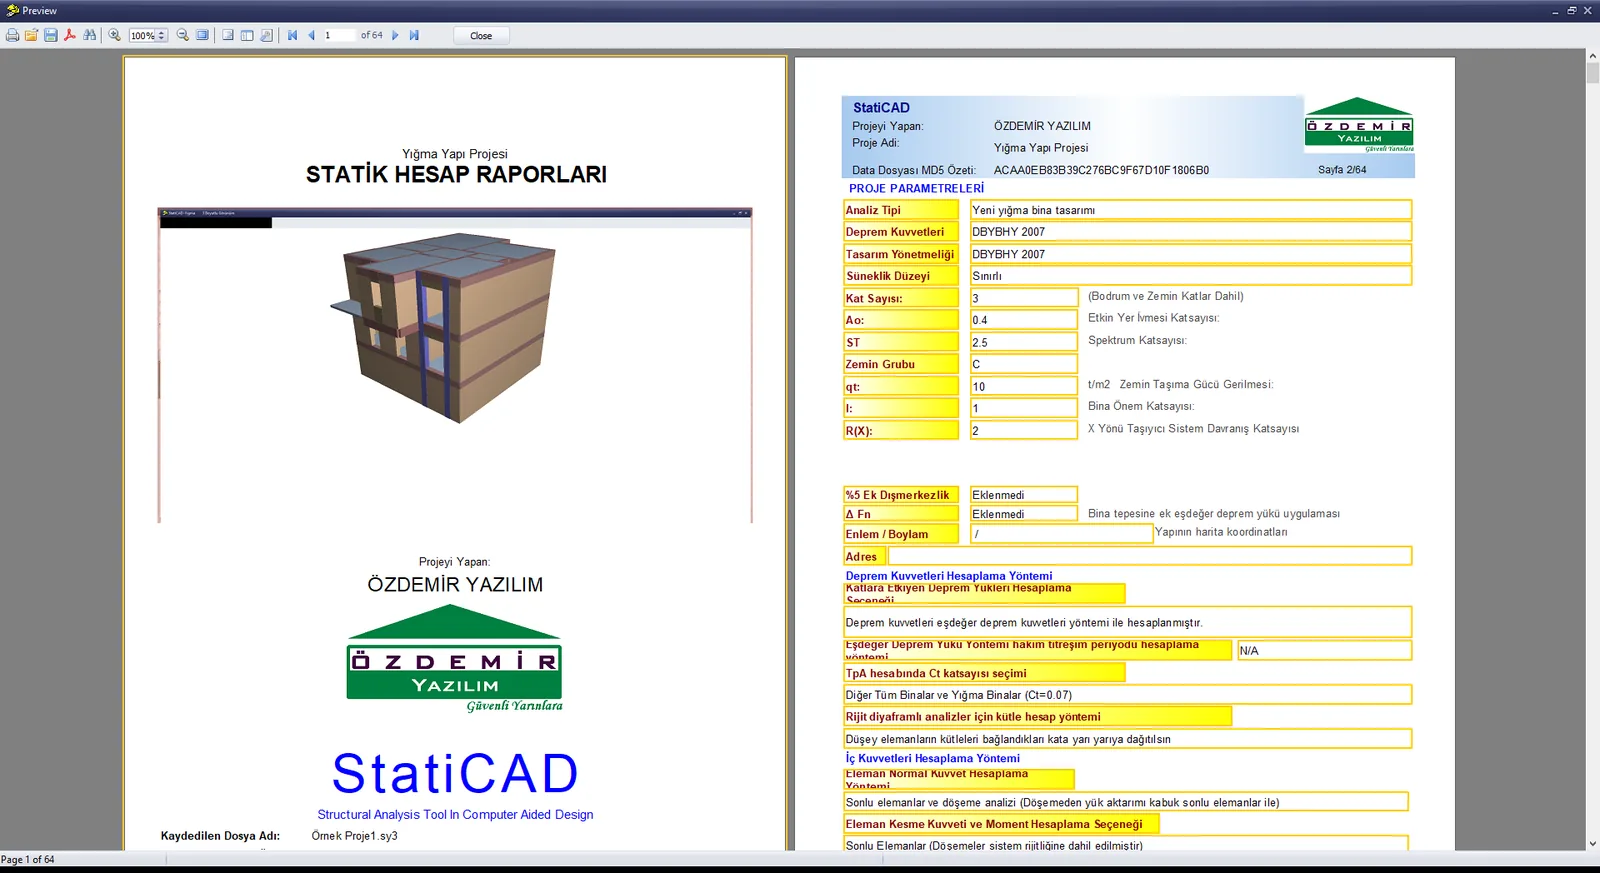
Report preview window: cover and project parameters pages
Toolbar of the preview window
| Button | Function |
|---|---|
| Printer | Prints the report. |
| Open / Save | Opens / saves and exports the prepared report (see “Exporting to PDF, Word and Excel”). |
| Exports the report as PDF. | |
| Binoculars | Searches for text within the report. |
| Zoom In, %, Zoom Out, Full page | Display scale. |
| Outline / Thumbnails / Page setup | Navigation panels and page settings. |
| First, Previous, page box, “of N”, Next, Last | Navigation between pages; a page number can be typed in the box and Enter pressed. |
| Close | Closes the preview and returns to the Report Selection window. |
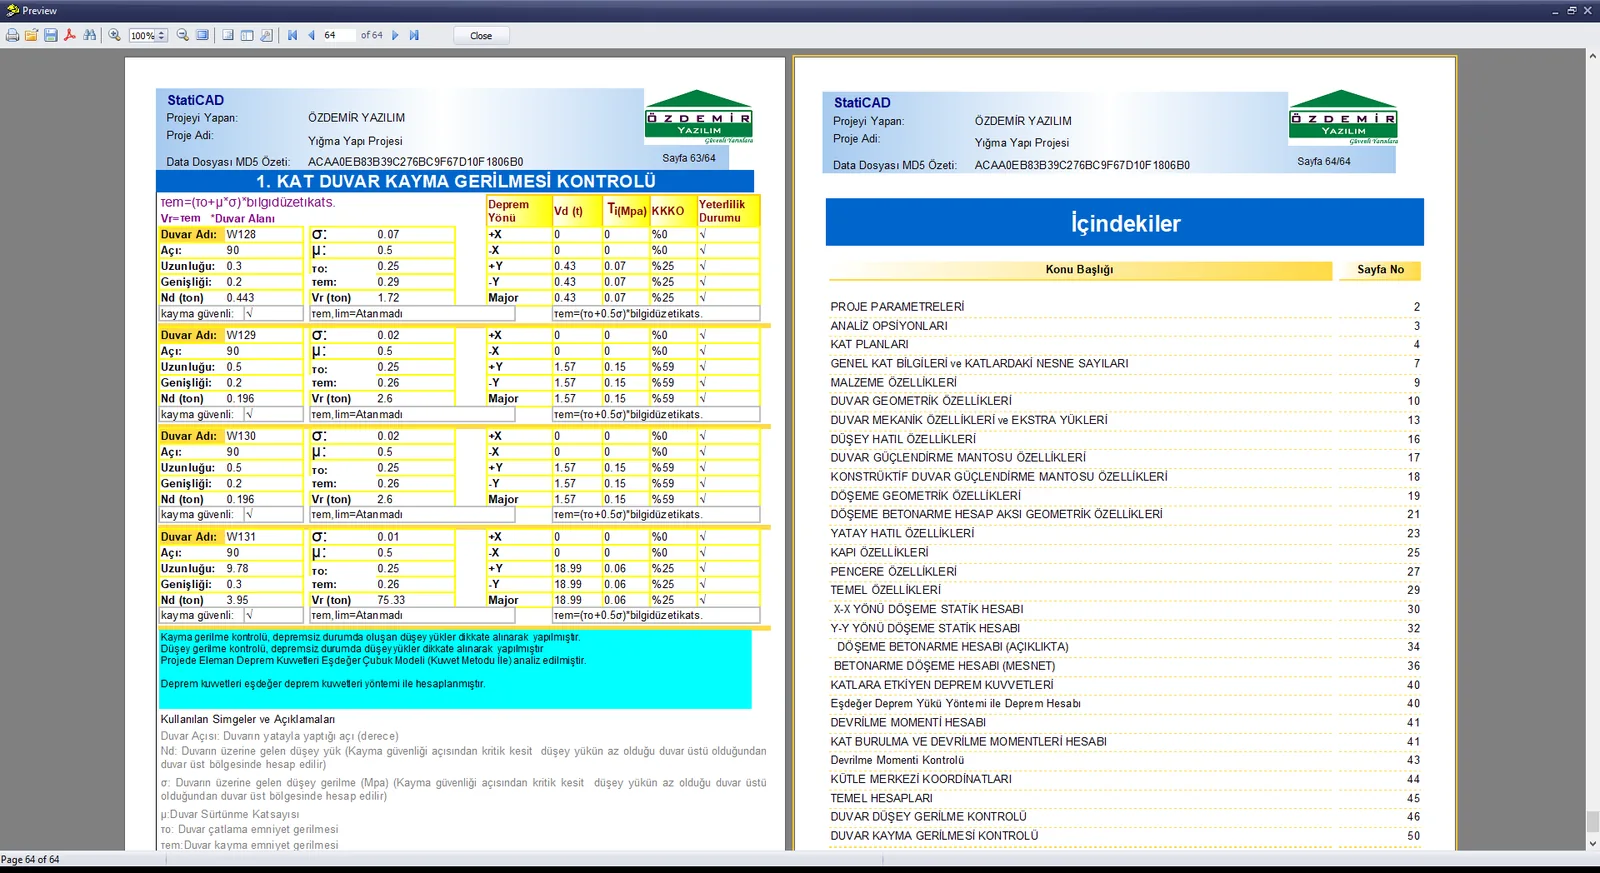
Wall shear stress check table and the Table of Contents page at the end of the report
3. Exporting to PDF, Word and Excel
The Save icon in the preview window lists the export formats: Prepared Report, PDF file, Microsoft Excel 2007 XML, Microsoft Word 2007 XML, JPEG image, Text file and Excel table (OLE).
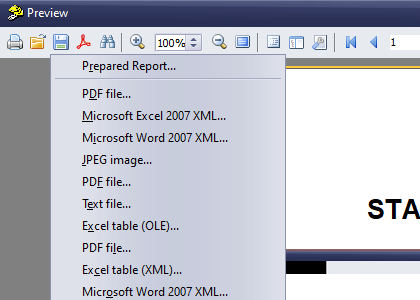
Report export formats
- Click the Save icon on the preview toolbar.
- Select PDF file… or Microsoft Word 2007 XML… from the list.
- In the window that opens, confirm the options and specify the save location/name.
- Close the preview with Close.
Tip: The preview is a separate window that fills the screen (title: Preview). Wait a few seconds while the report is being prepared; to leave the preview, click Close.
4. Single-Section Reports in the Report Menu
The Report menu produces the report of a single section without opening the Report Selection window: Create All Reports, Performance Report, Beam Bond Beam Loads, Wall Loads, Slab Calculations, Seismic Loads Acting on the Storeys, Shear and Mass Centre Summary Table, Shear / Mass Centre Coordinates, Wall Shear Forces, Wall Vertical Stress Checks, Wall Shear Stress Checks, Quantities and Detailed Quantities.