Applying Vertical Slope to Selected Elements
Applying Vertical Slope to Selected Elements with StatiCAD
If you need to apply a slope to certain elements on a storey — such as a roof storey — the slope can be assigned by changing the right and left elevation values of those elements. An easier approach is to select the elements you want to slope. Right-click on a selected element and click the "Apply slope to selected elements on storey" option, or click the slope button on the right toolbar of the screen. Then select the reference node point to be used for determining the elevations and direction, followed by the target node point. For ease of operation, select the first point you click as the point where the slope begins, and the last point as the point where the slope ends (for example, the ridge point) as your reference node points.
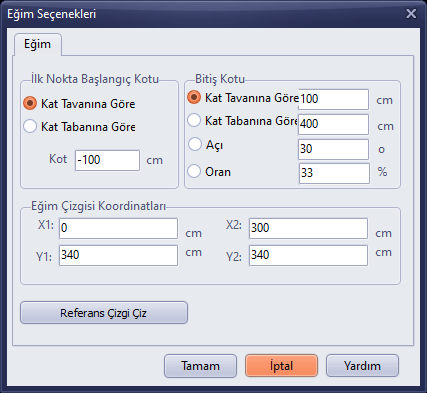
In the form that appears on screen, the default values show that the first point of the line you drew will be 100 cm below the storey elevation and the right point will be 100 cm above it. Change the value according to your project and press the OK button. When the OK button is pressed, the form will not close automatically, but the operation will have been performed according to the selected options. Check the 3D view to verify how the operation was carried out; if satisfactory, close the form with the X button; if not, change the parameters and press the OK button again.
You can watch the recording below for a video explanation of the topic.
You can access the video recording below for creating a door/window on a sloped wall at ridge level.